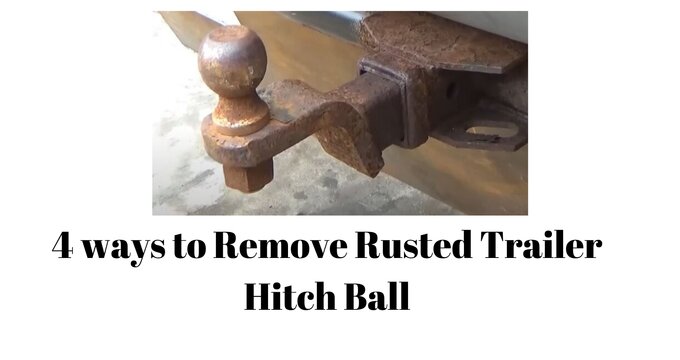
Dealing with a rusted trailer hitch ball may seem daunting, but fear not – removing it is entirely manageable with the right steps and tools. Take a deep breath and relax; you can tackle this challenge without the need for a mechanic. Whether you choose to go solo or enlist the assistance of a friend, follow these steps carefully to successfully remove a rusted hitch ball. Read on.
Why do you need to remove the trailer hitch ball?

When you leave your hitch ball on your vehicle, it becomes more exposed to the elements. This can cause rusting, speeding up the need for a replacement. You want your hitch ball to be in the most outstanding possible condition while it’s connecting thousands of pounds to your tow vehicle.
When driving down the road, always check to see if your vehicle’s license plate is visible. You can avoid being pulled over by the cops by removing your hitch ball while you’re not using it. If your hitch ball extends beyond your bumper, it may be difficult to see.
It may seem unbelievable, but hitch balls have been reported stolen from vehicles. A thief might steal your hitch ball in a matter of seconds if you don’t use a hitch lock. Depending on how often you use it, you might not even realize that your hitch ball is missing.
And last but not least, removing the hitch ball after your work is done keeps your hitch ball excellent and fresh so that you can easily maintain it, and it will last long.
Tools you need
To remove your rusted trailer hitch ball, you need only these tools available near you, which will be enough to remove it properly.
- Spray (WD40, BOESHIELD T-9, Permatex is recommended)
- Air Hammer
- Wrench
4 Simple ways to Remove Rusted or Stuck trailer hitch ball
It’s disconcerting to remove the hitch ball once it’s stuck. But don’t panic. Here are some of the guidelines to remove it easily:
1. Use a spray

It’s imperative to get a good quality penetrating spray to make your work easy. Take It to the hitch ball on the trailer and start spraying it.
Keep in mind that you are spraying liberally while spraying.
Here, you must spray the hitch receiver’s hole. After that, you must proceed to the next step to get the straw well inside the hitch receiver’s corners. And now it’s time to start spraying. Spray as much as you believe you need fluidly.
2. Use Air Hammering
What is an Air hammer? A rusted hitch ball will not perform as well when it comes to towing. In this situation, using an air hammer to remove it is a fabulous idea. After you’ve finished spraying, you’ll need to settle for a hammer. It’s only a matter of striking! You can’t use a standard hammer in this situation.
The first step is to rap the hitch receiver’s sides. After that, when you’ve finished with the sides, grab the bottom of the trailer hitch receiver and begin hammering. Use the air hammer on the top area of the receiver after you’ve finished tapping the bottom and sides.
So, you’ve finished air hammering all of the receiver’s pieces. Hammering has a set time limit. Don’t go overboard! It’ll be enough if you use your air hammer for 10 to 15 seconds. When it comes to removing corroded trailer hitch balls, a rubber hammer is one of the best investments you can make.
3. Keep doing
If you find yourself still grappling with the same issue, the solution is straightforward – persist with the hammering until you witness the ball mount of the trailer hitch beginning to loosen. To achieve this, carefully monitor the ball mount’s movement while simultaneously applying the steps outlined earlier with consistent effort.
Once the ball mount starts to loosen, it’s time to pull it out. The most straightforward method is to pull it out directly. If you encounter resistance during the pulling process, employ your hammer to tap it gently. With persistence, the ball mount should gradually disengage over time.
Keep in mind that when the ball mount is not in use, it is best to remove it.
If you’re doing a lot of towing, ensure the travel trailer has a weight-distribution hitch. Ball grease can also help to keep the rust away.
Read:
- Andersen: the best Weight Distribution Hitch in the market
- Eaz lift Recurve r6 weight distribution hitch Review
- Tighten the Hitch Ball (Step by Step)
4. Using a Wrench
Apply the spray to your hands and spray around the ball nut. For this, you’ll need WD-40, BOESHIELD T-9, or another lubricant that can get the job done. You must also ensure that you spray the thread areas in addition to the ball nut.
After you’ve finished spraying, you’ll need a wrench. The wrench will assist you in removing the nut that is causing you problems. To remove it, all you have to do is use the wrench.
It will gradually emerge. In any instance, it may remain trapped inside. If that’s the case, you’ll have to get the spray again and try again. Adding a pipe to the end of the wrench will increase leverage. You’ll be able to finish your task after that.
You can also watch this video guideline:
Conclusion
You’ve already checked on ways to get rid of a rusted trailer hitch ball without exerting too much work. The appropriate gears are required, and the rest is a piece of cake. However, remember that we always recommend taking preventive steps to keep the rust at bay rather than removing it later. Using grease or a hitch ball cap is recommended. It’s better to maintain your stuff so that it won’t create a hassle in the future.
Also read:


